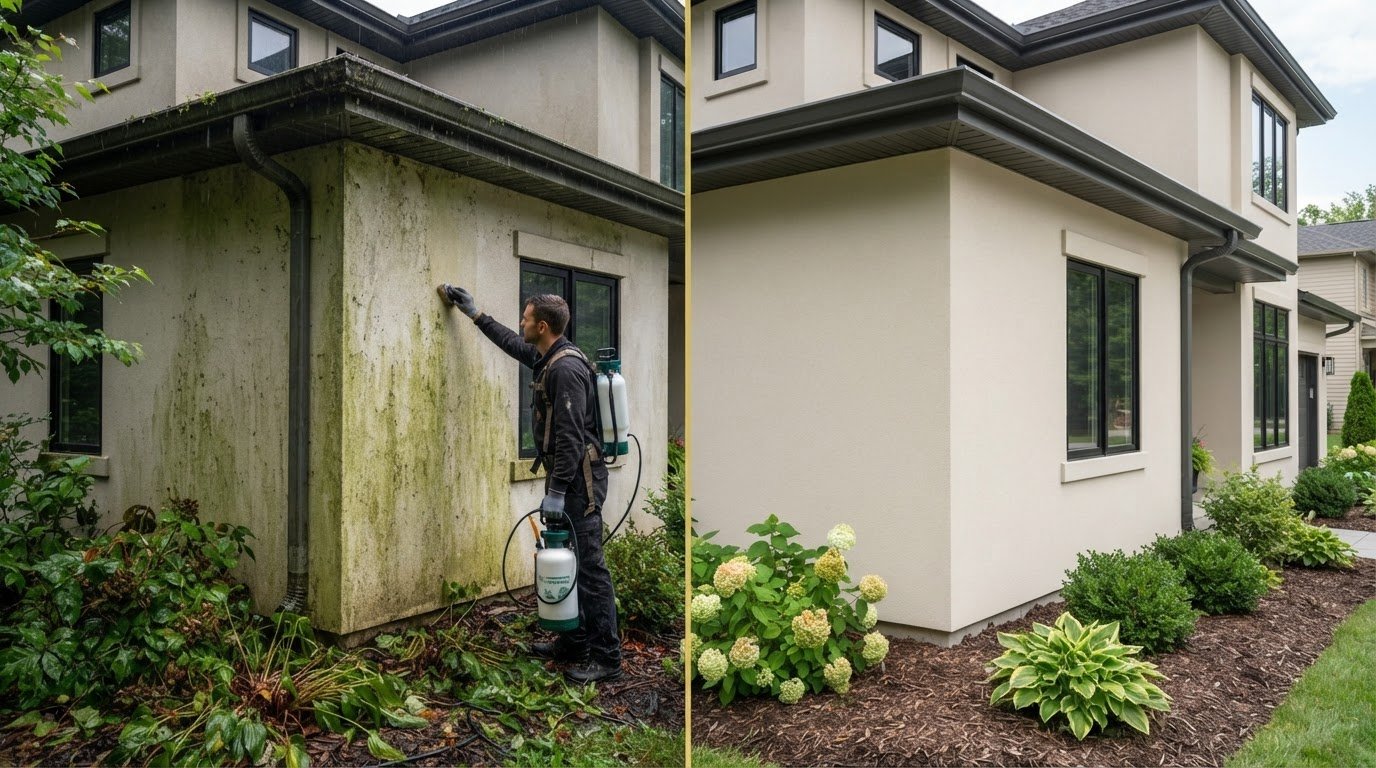
Visible algae, moss, mould or lichen is a clear sign your render needs attention. Render Cleaning should tackle the growth without scouring the finish: high-pressure washing can damage render and force water into the wall. Gentle cleaning with a treatment suited to organic growth helps address the cause, not just the marks.
Green patches and dark stains can make a tidy home look neglected, so it’s tempting to reach for a pressure washer. But render is more delicate than brick or stone, and forceful cleaning can create problems instead of solving them.
This guide explains when to clean rendered walls, how to remove organic growth, and why the right approach depends on the render finish and the type of staining. You’ll also learn how gentle washing works, what to consider before cleaning, and how to avoid mistakes that can harm the surface.
Key Takeaways
- Look for algae, moss, mould and lichen as signs your rendered walls may need attention, and consider whether damp, shade or nearby growth is encouraging them.
- Avoid high-pressure washing: it can damage the finish, worsen cracks and force water into the wall.
- Choose a cleaning method suited to the type of organic growth and the render finish, rather than relying on force to remove stains.
- For K-Rend and monocouche, check cleaner compatibility with the material and use a gentle approach to protect the surface.
- Follow product dilution and application directions, rinse thoroughly, then inspect the wall for remaining marks or imperfections.
When Does Your Render Need Cleaning?
Green algae, dark mildew marks, moss, or lichen are practical signs to inspect rendered walls. Check shaded elevations, areas below leaking gutters, and walls beside dense planting, where moisture and organic growth can linger. A useful Render Cleaning routine is to inspect the surface every 6-12 months and clean when staining appears, rather than waiting for widespread coverage.
Look beyond colour changes. Blistering, flaking, cracks or persistent damp patches can indicate a problem that cleaning alone won’t solve. Note where each mark appears and whether it grows after rain. This record can help distinguish surface grime from a recurring moisture source, such as overflowing gutters or water pooling near the wall.
Protective treatments can support regular maintenance, especially on walls exposed to high moisture or repeated organic growth. Water-repellent coatings can reduce moisture absorption by up to 95%. Choose a treatment suited to the render and follow its application directions. A coating won’t correct damaged render or stop water entering through an existing crack, so address visible defects first.
Protect nearby landscaping before applying a cleaner or biocide. Move pots, cover delicate plants, and keep children and pets away from the work area. Prevent cleaner from pooling in garden beds or running towards drains. The U.S. Environmental Protection Agency notes that residues rinsed from surfaces and sponges can enter the environment through drains.
How do you choose a professional render cleaning company? Look for a provider that identifies your render type, explains its cleaning method, and describes how it protects plants and surrounding surfaces. Ask how it selects and dilutes any biocide and manages runoff. These details matter because cement, lime and synthetic renders may need different care.
Are there local rules or environmental concerns for disposing of render-cleaning runoff? Yes. Dispose of runoff properly, since cleaning residues can reach drains and the environment. Local water-treatment authorities can provide guidance on disposal in your area.
What affects render cleaning cost, including property size and access? Key factors include the area being cleaned, render type, amount of organic growth, and access to each wall. A small, reachable elevation needs less setup than a large or awkward wall requiring access equipment. Extensive staining or delicate finishes can also affect the time and method required.
Pressure-washing risks to render
A pressure washer can make a rendered wall look cleaner quickly, but the force can harm the finish. Render is more porous and delicate than brick or stone. A concentrated jet may scour the surface, remove protective coatings, and expose weak spots to further weathering. Even a wall that looks solid can have hairline cracks where forceful water causes more damage.
Water ingress is another concern. High pressure can drive water through render and into the structure behind it. Trapped moisture may contribute to dampness and mould, especially where the wall already has cracks or damaged joints. The result can be worse than the original staining: a clean patch alongside new moisture marks, peeling or a weakened finish.
Pressure alone also doesn’t treat the cause of organic growth. It can remove visible algae without killing the spores, so staining may return. On a shaded wall that stays damp after rain, growth can recur even when the surface initially looks brighter. An appropriate treatment targets the organisms, not just the surface stain.
- Coating loss: A forceful jet can strip a protective finish, leaving render more exposed to moisture.
- Crack damage: Water pressure may widen existing hairline cracks or push water through them.
- Hidden moisture: Water forced behind the render can contribute to dampness and mould.
- Returning stains: Removing visible algae without treating spores can leave the conditions for regrowth.
Use a soft brush or a low-pressure hose rinse instead, and clean render only after it has cured. Direct water gently across the surface; don’t hold a jet on one mark or angle it into cracks. A low-pressure rinse can remove loose dirt and surface residue, while a suitable cleaner can tackle staining that brushing alone leaves behind.
Before choosing a method, inspect the wall for cracks, flaking or loose areas. Don’t direct water at these defects. If the render is already damaged, further washing can worsen weak points rather than restore the finish. Consider nearby windows, vents and plants too, since runoff and spray can reach them during rinsing.
Keep pressure washing for surfaces designed to withstand it, not as a shortcut for every exterior stain. For a separate patio or paved area, cleaners for outdoor stone surfaces are a more relevant place to explore surface-care options. On rendered walls, gentle rinsing and a treatment suited to the growth offer a more careful route to a lasting clean.
Algae, moss, mould, and lichen removal
Green streaks, dark patches and pale, crusty spots can point to different types of organic growth on rendered walls. Algae often leaves green marks; moss may gather in persistently damp areas, while lichen can cling tightly to the surface. Mould may appear where moisture and shade combine. Identifying the pattern helps you choose a treatment that targets the growth instead of simply shifting visible dirt.
Use a biocide-based cleaner when marks are biological, such as green algae or dark mould. For ordinary dust and general grime, a detergent-based cleaner may be more appropriate. These address different problems: detergent loosens surface dirt, while a biocide targets organic growth. Choose a product compatible with the render and follow its dilution and application instructions. Patio Black Spot Remover is suitable for use on rendered walling, visibly removing algae and other organic staining within 30 minutes of application.
Allow the cleaner to work for the period stated on its label, then rinse the wall thoroughly. Don’t scrub lichen or moss aggressively; hard brushing can disturb the render and leave uneven patches. If growth remains in textured areas, treat those spots carefully rather than increasing force across the whole wall. A gentle brush can help loosen surface residue after treatment.
- Algae: Treat green streaks with a cleaner intended for organic growth.
- Moss: Address damp conditions that let growth take hold, such as persistent shade.
- Mould: Use a suitable biocide treatment and rinse the surface as directed.
- Lichen: Give treatment time to work before gently removing loosened residue.
Weather and the wall’s surroundings affect how long results last. Soft-washing results on render typically last 12-24 months, depending on weather, moisture, and shading. A shaded wall beneath trees may need closer observation than a sunny, exposed elevation. Regularly clearing leaves and improving airflow near the wall can help extend the time before growth returns.
Don’t expect one cleaning method to suit every stain. A test on a small, inconspicuous area can show how the render responds before treating a larger section. Keep runoff away from plants, and rinse them with clean water if splashes occur. These practical checks help remove organic growth while preserving the finish and supporting lasting results.

Cleaning K-Rend and monocouche finishes
K-Rend and monocouche are modern render finishes, so match the cleaner and method to the specific material. Acrylic, silicone, lime and cement renders can respond differently; product compatibility is essential to avoiding surface damage. Patio Black Spot Remover can safely be used on K-Rend.
Methods for Different Render Finishes
This means selecting a cleaning approach for the render type and the staining, rather than using one solution on every wall. For K-Rend and other modern renders, soft washing is described as one of the safest and most effective methods. Acrylic, silicone, lime, and cement finishes still need a compatible cleaner, so identify the material before applying detergent or a biocide.
For general dirt, detergent-based cleaners can loosen grime. Hand washing removes an estimated 50-60% of surface grime, while soft brushing with detergent can remove up to 85%. These figures concern surface grime, not every kind of organic staining. Avoid assuming that a cleaner suitable for cement render will suit lime or a synthetic finish. Check its instructions for the specific material and test an inconspicuous area first.
If staining is biological, such as algae, choose a treatment intended for organic growth rather than relying on detergent alone. Keep the method gentle on textured monocouche finishes, where hard scrubbing can leave uneven patches. Compatibility matters because the wrong solution or excessive force can affect the finish as well as the stain.
Steps for Cleaning Rendered Walls
A careful cleaning sequence helps remove grime while limiting unnecessary abrasion. First identify the render and inspect it for cracks, flaking or loose areas. Clear loose debris with a soft brush, then apply a compatible cleaner diluted according to the manufacturer’s instructions. Leave it for the directed time so it can break down dirt and organic growth.
Patio Black Spot Remover should be sprayed onto the wall, working from top to bottom. To ensure perfect coverage, reapply to the wall after 5 minutes or so, leave to work for 2 hours then rinse gently with a hose, directing water over the wall rather than forcing it into cracks. Use a soft brush for stubborn surface grime, then rinse thoroughly to remove cleaner residue. Avoid high-pressure washing, which can damage render and drive water into the wall. Once the wall dries, inspect it for missed staining and imperfections that may need touch-ups. Gently rinsing a rendered surface down using a pressure washer is safe but adjust the distance of the lance to your surface, visually monitoring any pressure washing marks left behind if you've washed too closely.
Work in manageable sections so the cleaner doesn’t dry before rinsing. On textured monocouche, follow the texture with a soft brush instead of scrubbing across it. If a patch remains, reassess whether it’s general dirt or organic staining before repeating treatment. Applying the same solution again without identifying the stain may not improve the result.
Finish by checking the full wall in even light, including corners and areas beneath windowsills. A gentle method suited to the render helps maintain the finish while removing surface grime. For K-Rend, monocouche or another finish, let the material and cleaner instructions guide each decision.
How to clean rendered walls step by step
A controlled sequence helps remove dirt without stressing the finish. Identify the render type and staining, then use a compatible cleaner and gentle rinsing. Keep the product instructions close: dilution, application and rinsing directions guide the work from start to finish.
- Inspect the wall. Look for cracks, flaking, loose patches, and damp marks before adding water. Note whether staining looks like ordinary dirt or organic growth, such as green algae. Don’t treat damaged areas as routine cleaning spots, since water or brushing could worsen weak render.
- Prepare the area. Move pots and outdoor furniture away from the wall. Cover nearby plants, close windows, and protect vulnerable surfaces from splashes. Check where runoff will travel, especially around drains and planting beds.
- Remove loose dirt. Use a soft brush to clear cobwebs, leaves, and surface debris. For general grime, soft brushing with detergent can remove up to 85% of surface grime from render. Work gently, particularly on textured finishes such as monocouche.
- Mix the cleaner correctly. Choose a product compatible with the render and the stain. Dilute it according to the manufacturer’s instructions. Don’t guess at the mixture: an incorrect dilution can affect cleaning and leave residue.
- Apply and allow it to work. Follow the product directions and cover a manageable area evenly. Let the cleaner sit for the instructed time so it can break down dirt or organic growth. Avoid letting it dry on the wall.
- Rinse gently. Use a hose to rinse the surface thoroughly, directing water across the wall rather than into cracks. Avoid a high-pressure washer, which can damage render. Check that cleaner residue has been removed before moving to the next section.
- Inspect the result. Once the wall has dried, look for remaining stains, imperfections, or areas needing touch-ups. Reassess stubborn marks before repeating treatment; the stain type may need a different compatible cleaner.
Manage runoff as carefully as the cleaning solution. Render-cleaning runoff should be disposed of properly, and the U.S. EPA says local water-treatment authorities can provide guidance. Keep rinse water away from plants and drains where possible, and follow local disposal advice.
For a separate patio-cleaning task, explore cleaners for outdoor stone surfaces. Keep those products for their intended stone and paving surfaces, not rendered walls.
Patio Black Spot Removal INC: Patio Black Spot Remover
Patio Black Spot Removal INC offers Patio Black Spot Remover for organic staining on outdoor stone and paving, it is also safe for use on rendered walls. If you’ve cleaned your render and also have algae or black staining on a patio, use a product intended for that separate surface. Grean Boss Algae Remover can also be used on render to treat algae on rendered walling without the need to wash away, while Bluestone Cleaner Stone King is formulated for stone cleaning. For ongoing patio maintenance, Patio Black Spot Preventer helps address black spot and algae on external stone/cast surfaces.
Choose a external surface cleaning product suited to your stone surface from Patio Black Spot Removal INC.
Keep Your Exterior Care on Track
Make maintenance easier by treating each surface according to its material. A rendered wall and a stone patio need different cleaning products, so keep those tasks separate when planning an outdoor refresh. Inspecting surfaces after wet weather can help you spot new staining early and decide which needs attention first.
For patio and outdoor stone care, Patio Black Spot Removal INC offers Patio Black Spot Remover, Bluestone Cleaner Stone King and Patio Black Spot Preventer. These products are for stone and paving and can be used on rendered walls. Keep the care plan clear: use a render-compatible method for render and choose stone products for the patio.
If you’re planning your next exterior-care task, contact Patio Black Spot Removal INC about the right product for your stone or paving. With a surface-specific approach to Render Cleaning and patio maintenance, you can take the next step with confidence.
Frequently Asked Questions
Why Does Render Get Dirty?
Dust, airborne pollution, rainwater and organic growth collect on textured render. For example, a wall below a leaking gutter may develop repeated streaks, while a shaded elevation can stay damp and encourage algae or mould. Nearby trees may leave pollen and debris. Identifying whether marks come from dirt, water or biological growth helps you choose a suitable cleaning approach.
What is render cleaning?
Render cleaning removes dirt, staining and biological growth from a wall’s exterior coating. The method depends on the finish and type of contamination. Loose dust may need gentle brushing, while algae calls for a compatible treatment. The aim is to refresh the surface without abrading the render or driving water behind it.
How often should a rendered exterior be cleaned?
A general guide recommends cleaning rendered surfaces every 6-12 months, but visible condition should inform the timing. Inspect the wall during routine exterior maintenance, especially beneath gutters and on shaded sides. Clean when grime or organic marks appear, rather than waiting for heavy coverage. A sunny wall protected from overhanging branches may need less attention than a persistently damp, shaded elevation.
What methods and equipment are used to clean render safely?
Safe cleaning usually relies on a soft brush, a garden hose and a cleaner compatible with the render. A detergent-based product suits general grime; a suitable biocide-based treatment addresses organic growth. Apply the diluted cleaner according to its instructions, then rinse thoroughly with low pressure. Testing a small, inconspicuous area helps reveal whether the finish changes before you treat the full wall.
Can you pressure wash render, or will it cause damage?
High-pressure washing can damage render, so it’s not a suitable default cleaning method. A strong jet may strip a protective coating, worsen existing cracks or push water behind the finish. That moisture can contribute to dampness and mould. Rinse gently instead, and don’t direct water into damaged areas. If staining remains, identify its cause before choosing a compatible treatment.
What cleaning products remove algae, moss, mold, and dirt from render?
Use a render-compatible biocide-based cleaner for algae, moss or mould, and a suitable detergent for general dirt. Follow the label for dilution, application and rinsing, since a product made for one surface may not suit another. Patio Black Spot Removal INC’s outdoor stone products are intended for stone and paving, but can also be used on rendered walls. Match the cleaner to both the stain and the wall finish. To completely clean dirt and stubborn organic staining, use the Patio Black Spot Remover. For green algae treatment only, use the Grean Boss product.
What are the risks of DIY render cleaning?
DIY cleaning can damage the finish if you use excessive pressure, scrub aggressively or apply an incompatible cleaner. For example, directing a strong jet into a small crack can force water behind the render. Incorrect dilution may also leave residue or fail to treat the stain. Before starting, inspect the wall, read product directions, protect nearby plants, and avoid cleaning areas with loose or flaking render.
How do render cleaning methods differ for acrylic, silicone, lime, and cement render?
Acrylic, silicone, lime and cement renders can respond differently, so check that the cleaner is compatible with the specific material. Use a gentle approach, such as soft washing with low-pressure water and a suitable treatment.